Using the Page node
Use the Page node to add structure to your Kanzi application. For example, if your Kanzi application contains several views or parts, such as a music player, a photo album, and a calendar, create each on its own Page, and then use Page nodes to create the structure for each view or part.
The content you add to a Page node is visible in all Page nodes in its tree. So when you add content to the RootPage node, that content is visible in all Page nodes of that Kanzi application.
Kanzi uses its animation system to animate the transitions between Page nodes. See Animation system.
Creating application structure with Page nodes
Use the Pages window to create and manage your application structure.
To create application structure with Page nodes:
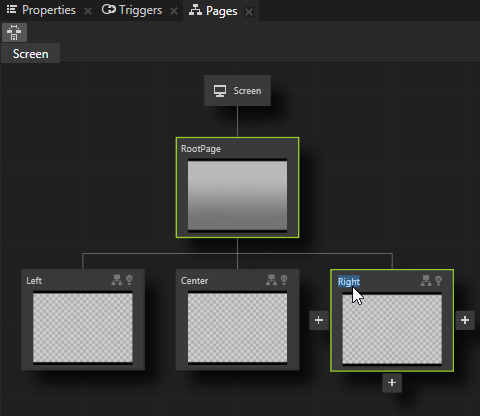
- In the Pages move your mouse pointer over the RootPage and click
 until you add several Page nodes to the RootPage page.
Double-click the name of the Page to rename a Page.
For example, create one parent Page named Top and under it three Page nodes named Left, Center, and Right.
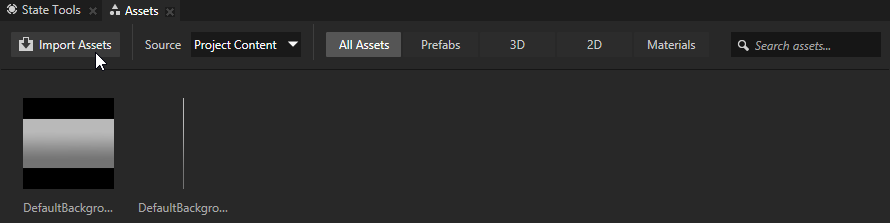
- In the Assets click Import Assets and import several images from your computer.
- Drag and drop images from the Assets to the Left, Center, and Right Page nodes in the Pages.
When you want to see in the Preview only the content of a selected Page, double-click that Page node and Kanzi Studio opens it in its own tab in the Preview.
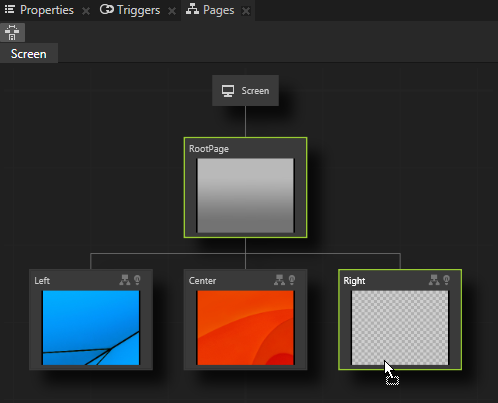
- In the Pages click each Page. In the Preview you can see the default cross-fade transition between the Page nodes.
Setting the transition type between Page nodes
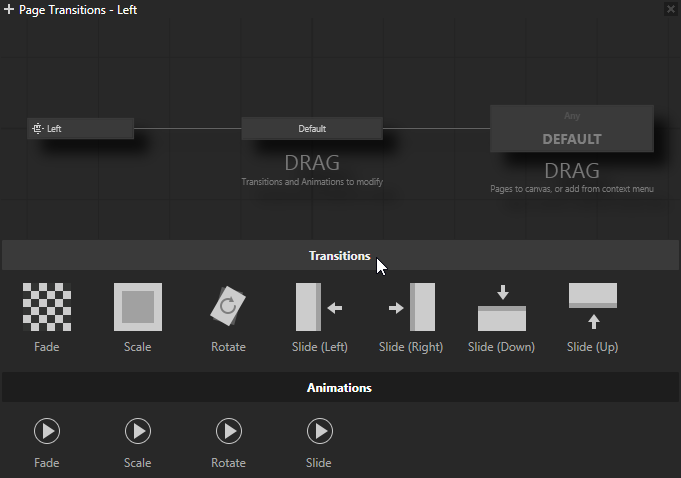
Kanzi by default uses a fade transition for transitions between all pages. Use the Page Transitions editor to set the transition type between pages in your application:
- Use Transitions to define both to and from transitions between pages.
- Use Animations to define either to or from transitions, or to customize the transitions.
To set the transition type:
- Create a structure using pages. See Creating application structure with Page nodes.
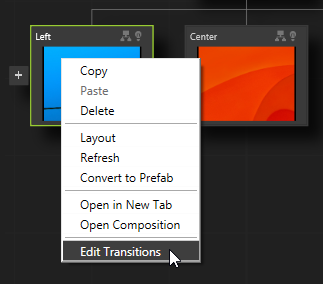
- In the Pages right-click the page for which you want to set the transition style and select Edit Transitions.
For example, set the transition type for the page named Left.
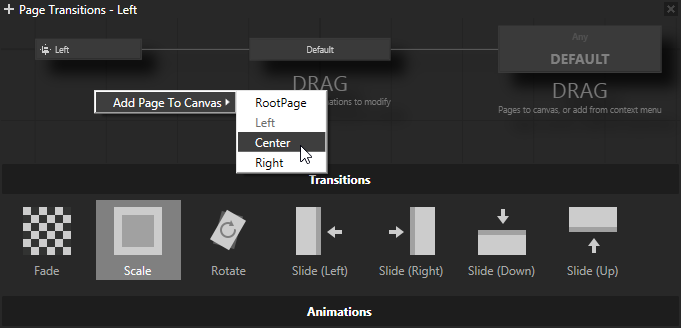
- In the Page Transitions editor click Transitions and from there drag a transition and drop it on the Default transition connector to set the default transition between this and any other page.
For example, drag and drop Scale to the transition connector.
In the Preview when you start a transition either from or to the page for which you set the transition type, the transition you set is used.

- (Optional) To edit the transition between the page from which you opened the Page Transitions editor and another page, right-click in the Page Transitions editor, select Add Page To Canvas and select the page.
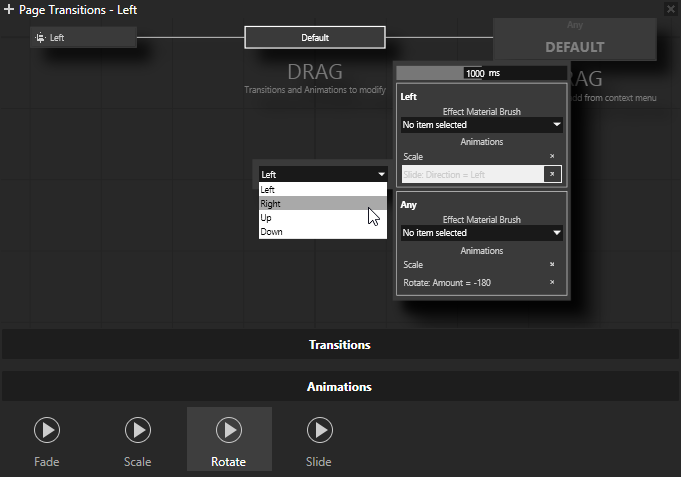
- (Optional) To customize a transition, in the Page Transitions editor click the Default transition connector. The top section contains the settings for the transition from this page to any page, and the bottom section settings for the transition from any page to this page. Set:
- Duration to the length of the transition in milliseconds.
- Transition Brush to the brush you want to use to render the page during the transition.
- Animations to one or more animations you want to use for the transition:
- To remove animations click X next to the animation.
- To add an animation drag it from Animations.
- To configure an animation click and set the animation. You can configure only Rotate and Slide animations.
Starting transitions between Page nodes in your application
When you click a Page node in the Pages, Kanzi Studio shows the transitions between the Page nodes in the Preview. However, to start the transitions between the Page nodes in your application you need to use a trigger with one of the Navigate to actions.
To start a transition between pages in your application:
- Create a structure using pages. See Creating application structure with Page nodes.
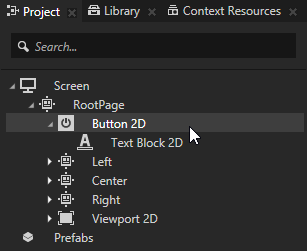
- In the Project select the RootPage page and create a Button 2D. See Using the Button nodes.
The objects you add to a parent page are visible in all its child pages.
- In the Project select the button you created and in the Triggers click the drop-down menu for your message type and select an action:
- Navigate to Page goes to the page in your Kanzi application you set in this action.
- Navigate to Next Subpage goes to the sibling page to the right of the current page as shown in the Pages window.
- Navigate to Previous Subpage goes to the sibling page to the left of the current page as shown in the Pages window.
- Navigate to Parent Page goes to the page that is the parent page of the page you select in this action.
For example, select the Navigate to Next Subpage action and set the action to the RootPage.
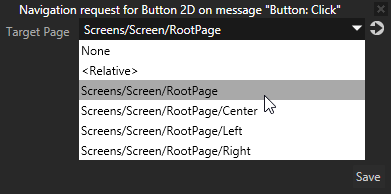
In the Preview click the button. Every time you click the button you advance one page to the right: Left to Center, Center to Right, Right to Left, and so on.
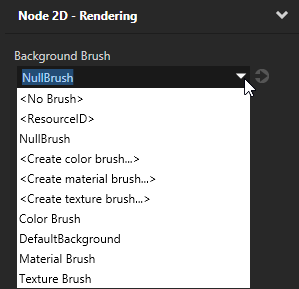
Setting the background of a Page node
Use brushes to set the background of 2D nodes. In Kanzi all 2D nodes by default have transparent background.
To set the background:
- Create a Color Brush, a Texture Brush, or a Material Brush. See Using brushes.

- In the Project select the 2D node the background of which you want to paint.
Note that you can set only the background of 2D nodes.
- In the Properties click
 , add the Background Brush property, and select the brush you created in the first step.
Using Page in the API
For details, see the API reference.
See also
Triggers

Open topic with navigation